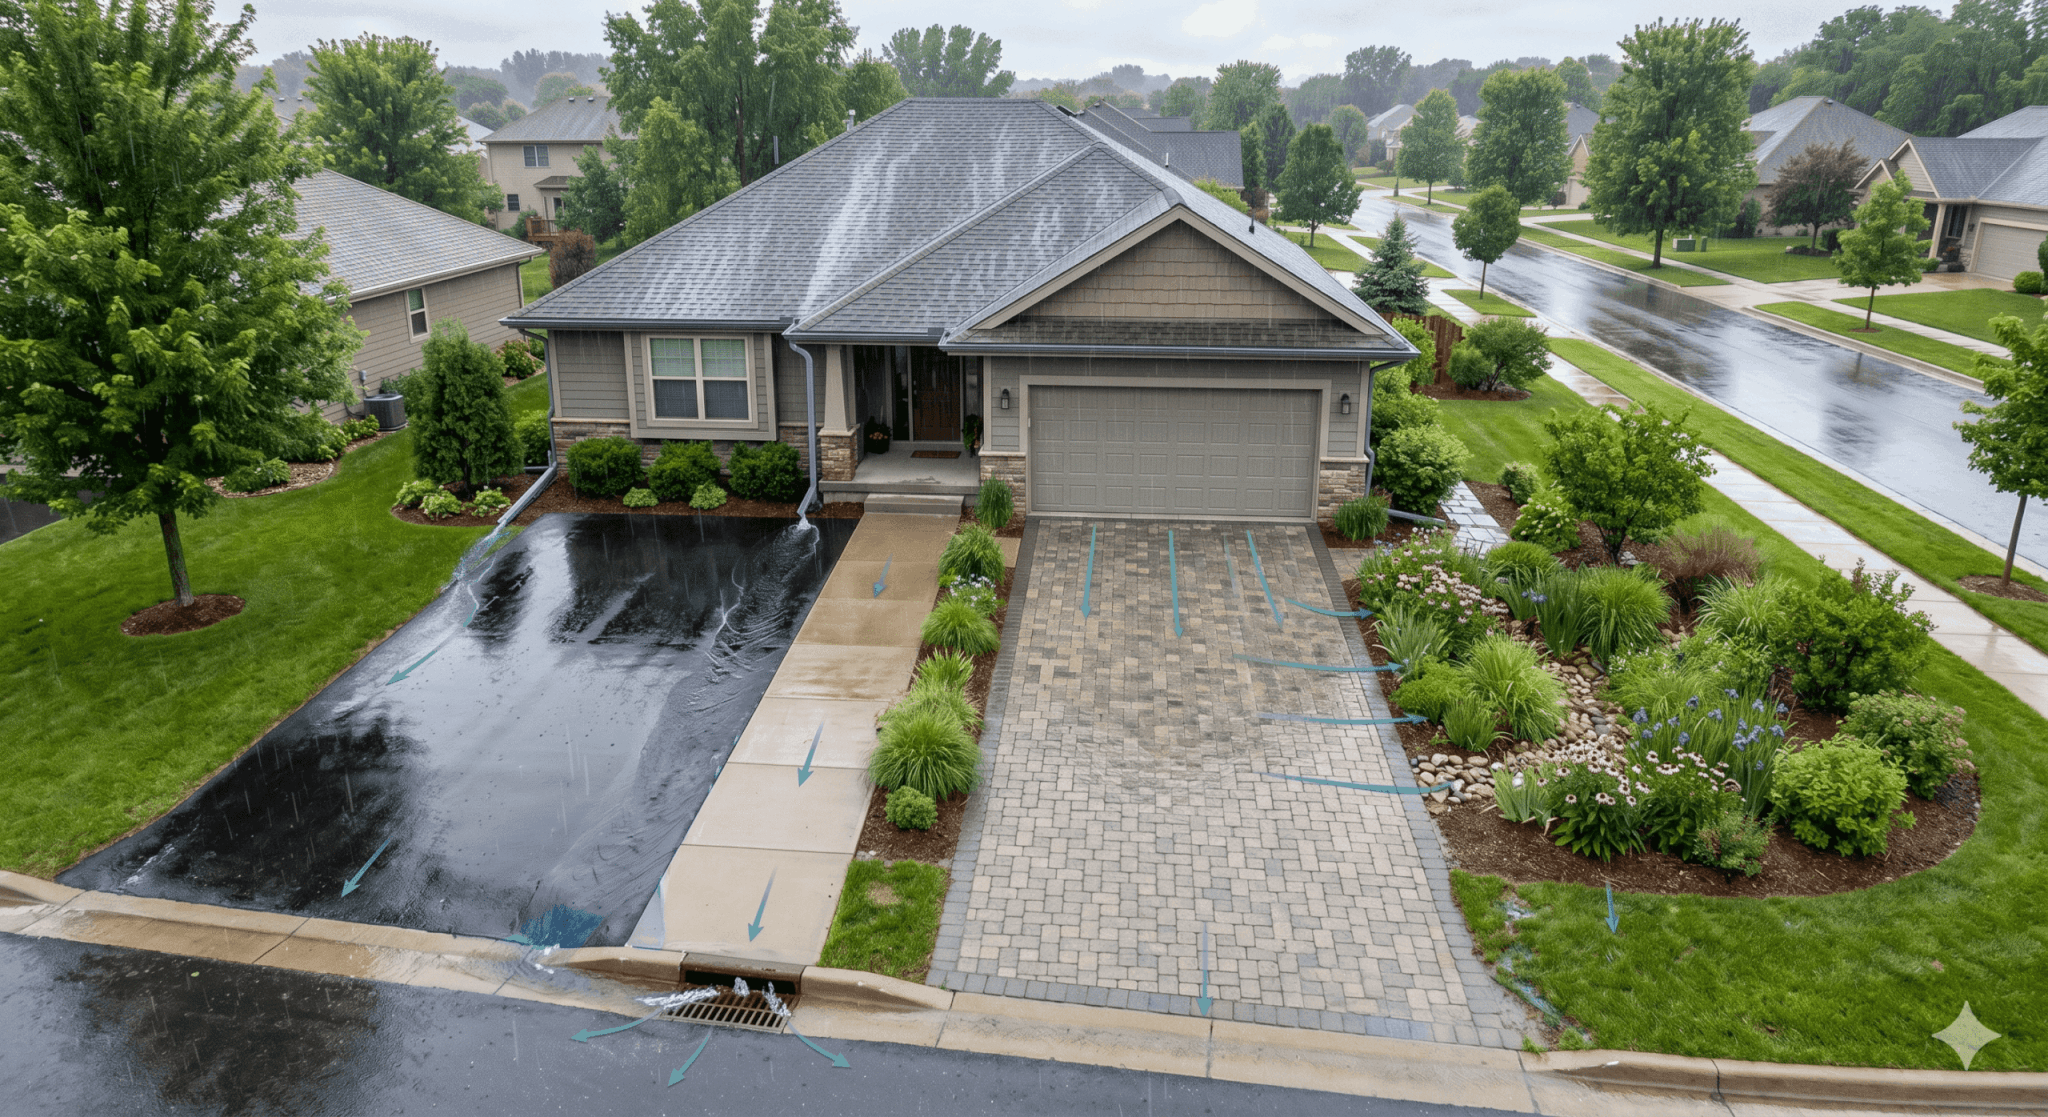

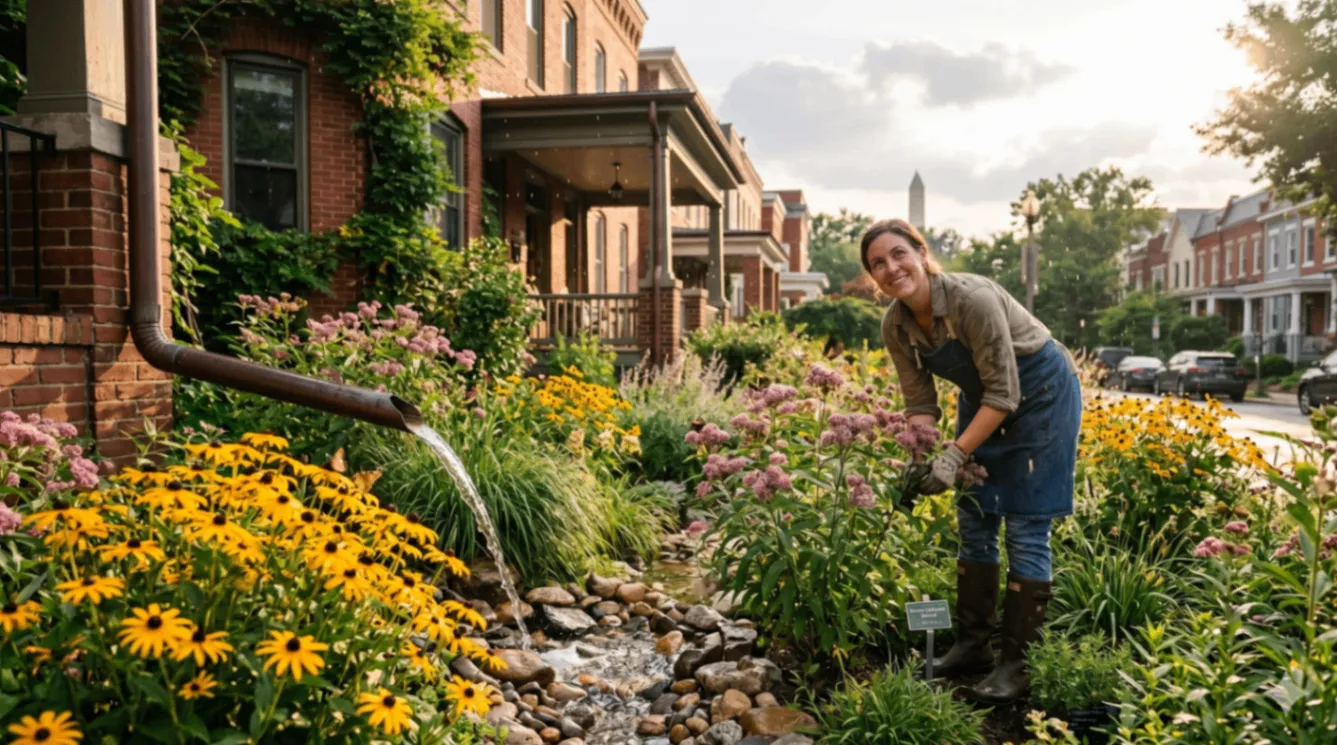

Watch your yard during a rainstorm and you’ll see the same problems every time. Water pools near the foundation, runs off the driveway, or carves a path through the lawn before disappearing into the storm drain. You’ve probably learned to live with it. A rain water garden turns that runoff into a resource, directing water into a planted basin where it soaks into the ground naturally, filters pollutants, and supports local plants and pollinators along the way.
Building one is more straightforward than most people expect. The project comes down to picking the right spot, understanding your soil, sizing the basin to match your drainage area, and choosing plants that thrive in wet-dry cycles. Done well, a rain garden handles thousands of gallons of runoff per year, cuts down on flooding, and looks better than a soggy lawn.
You’ll learn site selection, soil testing, planting, overflow design, and long-term maintenance — everything you need to get it right the first time. We’ve included a sizing formula, seasonal upkeep table, and rebate guidance that can cut your costs through Rainplan.
Quick answer: Size your rain garden at 10–20% of its contributing drainage area (a 1,000 sq ft roof section needs 125–167 sq ft of garden), place it at least 10 feet from your foundation, and plan for water to drain within 48 hours. DIY construction costs $500–$2,500 using native plants and amended soil. Most rain gardens qualify for stormwater credits within 1–2 years and need no supplemental watering after year two.
Key takeaways
- Location and soil testing make or break your rain garden: Pick a spot at least 10 feet from your foundation, test drainage, and confirm water soaks in within 48 hours before you dig.
- Sizing your garden correctly prevents flooding and failure: Use your roof’s square footage and expected rainfall to calculate the right basin size — most homes need 100 to 300 square feet.
- Native plants do the heavy lifting once established: Organize plantings by moisture zone so each plant thrives, and expect minimal upkeep after the first two growing seasons.
- Rainplan maps available rebates directly to your address: Many municipalities offer cost-share programs and material reimbursements — Rainplan identifies which ones you qualify for so you skip the guesswork.
- DIY costs start as low as $3 per square foot: With local incentives applied, your net investment is often far lower than you’d expect for a permanent stormwater solution.
What is a rain water garden?
A rain water garden is a shallow, planted depression that captures and filters stormwater runoff from roofs, driveways, and other hard surfaces. Unlike regular garden beds, rain gardens temporarily hold water so it soaks into the ground instead of rushing into storm drains or pooling in your yard.
Rain hits your roof, flows down the gutters, and collects in a planted basin designed to hold it temporarily. The water pools briefly — usually just a few hours — then infiltrates into the soil below. The soil and plants filter out pollutants — fertilizers, oils, sediment — before water reaches groundwater.
A properly functioning rain garden drains completely within 24 to 48 hours, so you won’t create mosquito habitat or swampy conditions. That’s what keeps your rain garden from turning into a bog.
Why build a rain water garden?
A rain garden turns a drainage problem into a landscape feature that cuts your water bills and often qualifies for local rebates. These gardens solve several problems at once — foundation protection, wildlife habitat, and better drainage.
Here’s what you get:
- Reduces yard flooding: Captures runoff before it pools in low spots or threatens your foundation.
- Filters pollutants naturally: Plants and soil remove sediment, fertilizers, and oils from stormwater.
- Cuts irrigation costs: Captured rainwater reduces the need for supplemental watering.
- Creates wildlife habitat: Native plants attract pollinators, birds, and beneficial insects.
- Qualifies for incentives: Many municipalities offer rebates for residential rain gardens.
Your rain garden works hardest during storms, but it pays off year-round. During dry spells, deep-rooted native plants tap into moisture other landscape plants can’t reach. The plantings look good through every season and need less maintenance than a traditional landscape once they’re established.
How to build a rain water garden in 10 steps
Turn Runoff Into Rebates
Join Rainplan to access personalized data and discover sustainable solutions tailored to your specific site.
Get the planning right and the digging is easy. The most common failures (poor drainage, wrong location, inadequate sizing) happen when people skip the planning steps.
Nail the site selection, soil testing, and sizing, and construction is straightforward. Here’s exactly how to do it.
Step 1: Choose the right spot
Pick the wrong spot and you’ll fight drainage problems for years. The right spot catches runoff without threatening your foundation and works with your soil’s drainage.
Don’t skip these requirements:
- Maintain 10+ feet from foundations: Water near your home invites basement seepage and structural issues.
- Avoid existing wet spots: Areas that already pool indicate poor drainage that won’t improve with a rain garden.
- Find gentle slopes under 12%: Flat to mild slopes work best; steep areas require excessive excavation.
- Keep 50 feet from wells and septic systems: Protects drinking water and prevents system interference.
- Call 811 before digging: This free service marks underground utilities and is legally required in most states.
Look near downspouts or anywhere runoff naturally flows across your property. Watch your yard during a rainstorm to identify these natural collection points before committing to a location.
Step 2: Test your soil
If your rain garden holds water longer than 48 hours, it’s not working — and you’ll have mosquitoes. Testing your soil’s infiltration rate takes about an hour and prevents a failed project.
Do this percolation test first:
- Dig a test hole 10 inches deep in your planned garden location.
- Fill it completely with water and let it drain.
- Refill and measure how long it takes to drain completely.
What your results mean:
- Drains within 24–48 hours: Your native soil works fine — no amendments needed.
- Drains slower than 48 hours: You’ll need to amend or replace the soil (covered in Step 6).
Clay soils drain slowly, but you can fix that. The right amendments turn even heavy clay into soil that drains properly.
Step 3: Plan the size and shape
The math is simpler than you’d think. You need three numbers: the drainage area, expected rainfall, and basin depth.
Use this formula:
Rain garden area = Drainage area × Design rainfall ÷ Basin depth
For example: a 1,000 square foot roof section with 1 inch of design rainfall and a 6-inch deep basin needs approximately 167 square feet of rain garden — about the size of a 10 × 17 foot rectangle. Most residential rain gardens range from 100 to 300 square feet.
Can’t fit everything in one spot? Split the runoff between two smaller gardens. Kidney, teardrop, and oval shapes work best because they slow water flow and blend naturally into your landscape. Rainplan’s property assessment tools can help calculate your specific runoff volumes and optimal garden sizing based on your address and impervious surfaces.
Step 4: Gather your materials
Get everything ready before you dig so you’re not making supply runs mid-project. The right materials keep your rain garden from turning into a mud pit.
| Material | Purpose |
| Shovel and wheelbarrow | Excavation and soil transport |
| Stakes and string line | Marking boundaries and checking level |
| 1–3 inch rock or river stone | Inlet protection against erosion |
| Coarse sand and compost | Soil amendment for drainage |
| Shredded hardwood mulch | Moisture retention and weed control |
| Native plants | Basin vegetation |
| 4-inch perforated pipe (optional) | Observation well for monitoring |
Skip the bark chips. Skip the bark chips — they float away during storms. Shredded hardwood stays put and breaks down slowly, enriching your soil over time.
Step 5: Excavate and level the basin
Take your time here — precision matters more than speed. Level the basin floor so water spreads evenly instead of pooling in corners.
Here’s how to dig it:
- Dig to your planned depth — typically 4 to 8 inches for residential gardens.
- Check the basin floor using a long board and level as you work.
- Cut deeper into the uphill side on sloped ground to create a level floor.
- Build a low berm on the downhill edge using excavated soil, compacting it gently to hold water.
- Create a shallow overflow notch in the berm to direct excess water away during heavy storms.
Don’t skip the overflow notch. Without it, your first major storm will flood the garden.
Step 6: Amend the soil
If your percolation test showed slow drainage, this step fixes it. Even decent native soil benefits from some amendment.
Mix your soil like this:
- 50–60% coarse sand: Creates drainage channels.
- 20–30% topsoil: Supports root development.
- 20–30% compost: Adds nutrients and improves structure.
Mix these components thoroughly before filling your basin. Avoid landscape fabric on the sides because it blocks water movement. Severely poor drainage needs a gravel layer beneath the soil mix, which usually means hiring a pro.
Step 7: Set up inflow and overflow
Control where water enters and exits to prevent erosion and manage overflow. Get these right or your garden will wash out during storms.
Set up each zone like this:
- Inlet: Line the entry point with 1 to 3 inch rock or river stone. This splash pad slows water velocity and prevents soil erosion where runoff first enters.
- Overflow notch: Stabilize with rock to handle excess water during intense storms.
Overflow direction: Aim toward your lawn, a second rain garden, or an existing storm drain — never toward
Rain Garden Plant Selection by Zone
Plant selection is the most common place rain gardens fail. The wrong plants in the wrong zone either drown or dry out. Match plants to the zone they’ll actually live in:
| Zone | Conditions | Top Plant Choices | Avoid |
|---|---|---|---|
| Bottom (ponding zone) | Saturated 24–48 hrs after rain; dry between storms | Blue flag iris, swamp milkweed, cardinal flower, soft rush, Virginia sweetspire | Most upland plants; lavender; rosemary |
| Side slopes (transition zone) | Wet-dry cycles; good drainage | Black-eyed Susan, native sedges, switchgrass, swamp rose, goldenrod, Joe-Pye weed | Drought-only plants; succulents |
| Rim (dry zone) | Normal garden conditions; rarely wet | Purple coneflower, little bluestem, native aster, wild bergamot, native shrubs | Moisture-loving plants; willow |
Rain Garden Plants by US Region
| Region | Bottom Zone | Middle Zone | Rim Zone |
|---|---|---|---|
| Northeast / Mid-Atlantic | Blue flag iris, buttonbush | Switchgrass, swamp rose mallow | Purple coneflower, black-eyed Susan |
| Southeast | Cardinal flower, lizard’s tail | Native ferns, river oats | Native aster, beautyberry |
| Midwest / Great Plains | Blue flag iris, swamp milkweed | Prairie dropseed, goldenrod | Little bluestem, wild bergamot |
| Pacific Northwest | Oregon iris, skunk cabbage | Red-twig dogwood, sedges | Flowering currant, camas |
| Southwest / Arid | Desert willow, rush | Agave, desert marigold | Desert sage, penstemon |
Native plants establish 30–50% faster than non-natives and need no supplemental watering after year two. Source plants from regional native nurseries for best results.
Common rain garden mistakes (and how to avoid them)
Most rain gardens that fail do so before the first plant goes in. The construction errors below account for the majority of rain gardens that flood, kill plants, or simply stop draining within a season or two.
1. Siting it too close to the foundation
The single most common mistake. Any rain garden closer than 10 feet to your foundation risks pushing water toward your basement rather than away from it. The minimum clearance is 10 feet; 15–20 feet is safer on clay soils where lateral water movement is slow. Also avoid locating rain gardens over septic systems, within 25 feet of a well, or at the base of a steep slope where erosion will continuously deposit sediment into the basin.
2. Undersizing the garden
A rain garden sized at less than 10% of its contributing drainage area will overflow during moderate storms — exactly the event it needs to handle. Use the sizing formula: garden area = contributing impervious area ÷ 6 (clay) to 8 (sandy). A 1,200 sq ft roof section needs a garden of at least 150 sq ft. Going smaller means water spills over the rim and defeats the purpose. If your site is constrained, split the drainage area between two smaller gardens rather than building one that’s too small.
3. Using the wrong plants — or skipping the zone check
Rain garden plants must tolerate two opposite conditions: saturated soil for up to 48 hours after rain, then dry conditions between storms. Most ornamental plants can’t handle the wet-dry cycling and die in year one. Common failures include lavender, rosemary, most succulents, and drought-only ornamentals placed in the ponding zone. Select plants rated for both wet feet and dry spells, and match them to your specific zone within the garden — the bottom (ponding zone), the slopes (transition zone), and the rim (dry zone) each need different species. Native plants sourced from regional nurseries establish 30–50% faster and need no supplemental watering after year two.
4. Skipping the soil amendment
Native soil — especially clay — drains too slowly to empty the rain garden within 48 hours. A rain garden that holds water longer than two days becomes a mosquito breeding site and suffocates plant roots. The standard rain garden soil mix is 50–60% sand, 20–30% compost, and 10–20% native topsoil. Excavate 8–12 inches and backfill with this engineered mix rather than replacing with what came out of the ground. If your native soil drains well (sandy loam), amendment requirements are lighter — test drain time by filling the excavated bed with water and timing how long it takes to empty.
5. No overflow outlet
Every rain garden needs a designed overflow path for storms that exceed its capacity. Without one, a large storm event will find its own path — often toward the foundation or into a neighbor’s yard. The overflow can be as simple as a low point in the rim berm directed toward a lawn or bioswale, or a perforated pipe leading to the street. Plan it during design, not after the first big rain reveals the problem.
Frequently asked questions
How big should a rain garden be?
A rain garden should be 20–30% of the impervious area draining into it. For a typical single downspout serving 200 square feet of roof, a 50–100 square foot rain garden is sufficient. Larger drainage areas require proportionally larger basins to prevent overflow during heavy storms.
How deep should I dig a rain garden?
Dig 6–18 inches deep depending on your soil type. Sandy soils need only 6–8 inches. Clay soils need 12–18 inches combined with soil amendment or an underdrain. The ponding depth — measured from the overflow outlet down — should be 6–9 inches maximum.
How much does it cost to build a rain garden?
A DIY rain garden costs $100–$500 for materials including plants, amended soil, mulch, and a downspout diverter. Professional installation runs $1,000–$4,000 depending on size and soil conditions. Many municipalities offer rebates of $200–$2,000 that significantly offset installation costs.
What plants are best for a rain garden?
Native plants adapted to your region are always the best choice — they establish faster and need less water after year one. Bottom zone (wettest area): blue flag iris, swamp milkweed, cardinal flower. Slopes: black-eyed Susan, native sedges, switchgrass. Rim (dry zone): coneflowers, little bluestem, native shrubs.
Does a rain garden attract mosquitoes?
No, when properly built. Mosquitoes need standing water for 7–10 days to complete larval development. A correctly built rain garden drains within 24–48 hours after a storm. If your garden holds water longer than 3 days, the soil needs amendment or an underdrain — which also eliminates any mosquito breeding risk.
Find Rainwater Rebates in Your Area
Enter your address to see local rebates for rain barrels and green infrastructure. Many programs cover 50%+ of costs.